NeedleNine provides complete course management for both Part 61 and 141 operations using Next Gen training features including AQP grading, standardization and insights. All courses are completely customizable to your needs. To create a new course, follow these simple steps:
- Log into NeedleNine as Chief Instructor.
- Select Course option from lefty nav menu.
- Click + New Course in top right corner.
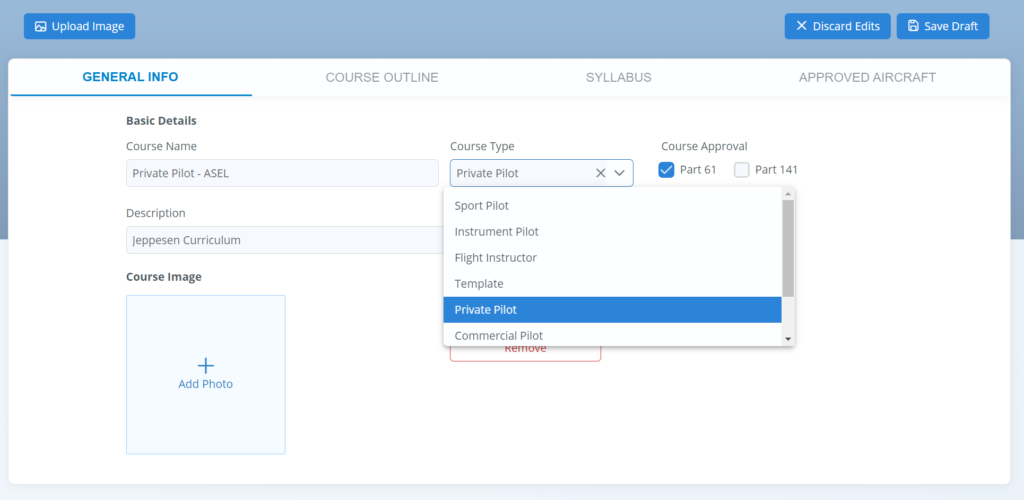
- This opens screen to enter basic course information. Enter applicable information and Save Draft to create course.
- The Course Name will be displayed for enrollment options, reservations and reports.
- The Course Type will prepopulate applicable ACS information for selection of lesson tasks.
- Choose if this course is approved for Part 61, Part 141 or both.
- Enter optional description to display on course tile.
- You may upload image to display in header. The crop tool will size appropriately.
- You may also upload an image to display on course tile. Otherwise a generic icon will be shown.
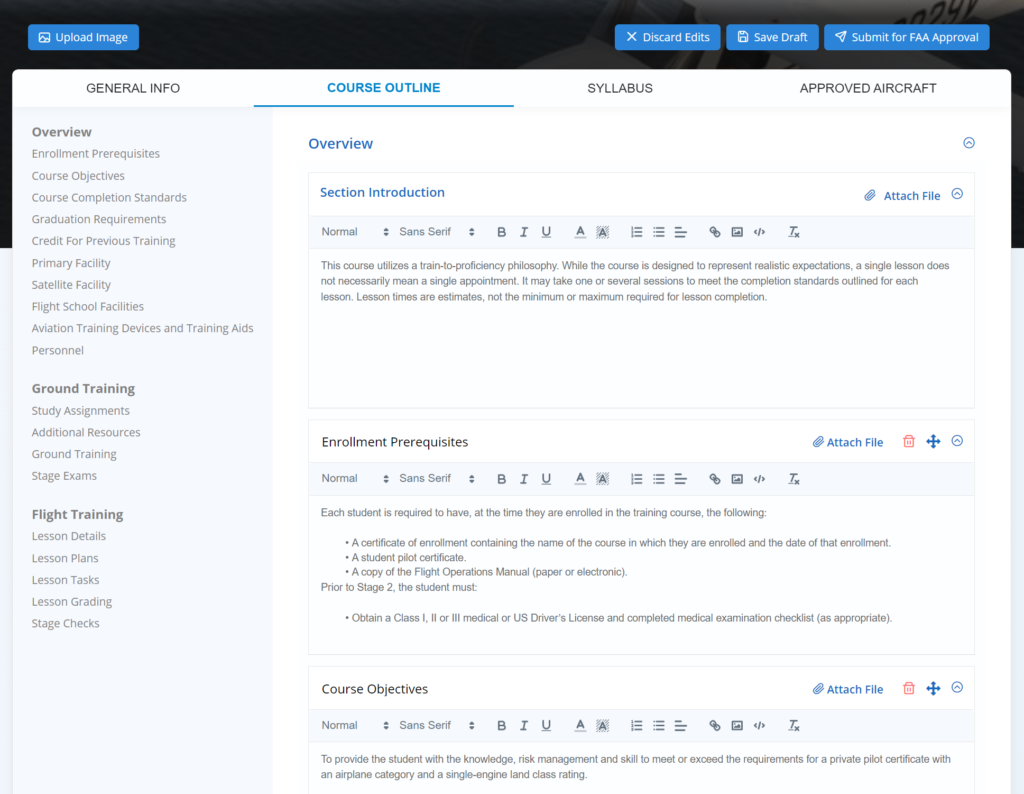
5. Once you have created the course you can begin creating the Course Outline. If you are creating a Part 141 course, this is all sections of your TCO. Otherwise you can enter as much or little as you like. All sections are visible to users once published so be sure to include any relevant information to describe course to students.
- Enter text for Section Introduction to describe course.
- Click + Add Section to add as many sections as you need. You can also upload PDF files to sections such as floorplan for 141 requirements. This example demonstrates a complete TCO.
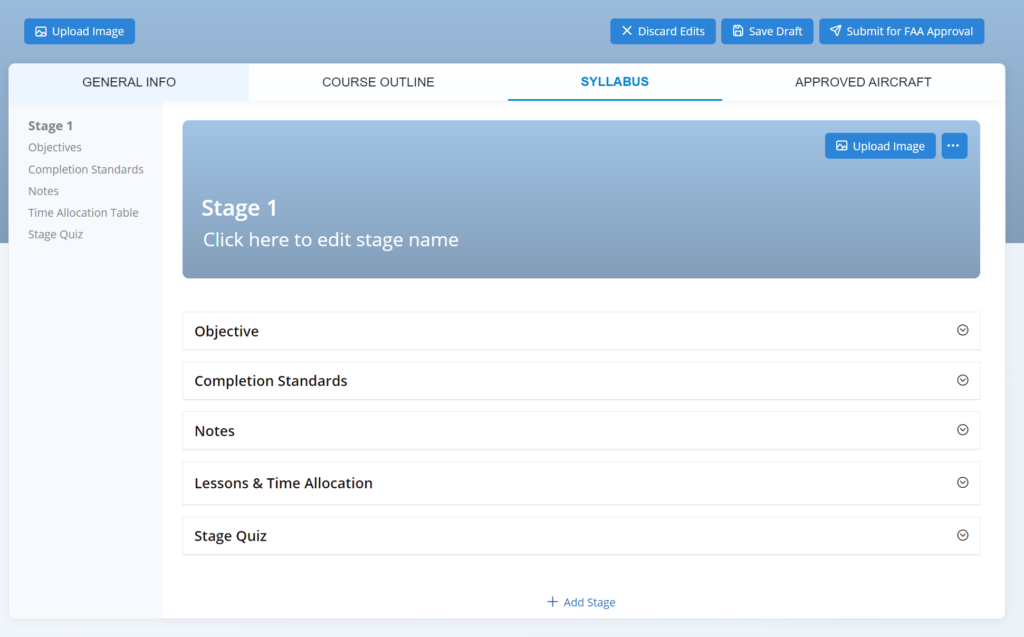
6. Next, create a stage using + Add Stage link. This will add a stage pre-populated with the following sections:
- Upload Image – Upload an image to be displayed at stage header.
- Objective – Enter stage objectives
- Completion Standards – Enter stage completion standards
- Enter optional notes applicable to stage
- Lessons and Time Allocation – Creating lessons described in detail next step.
- Stage Quiz – Create optional multiple-choice quiz for stage knowledge areas.
- Save Draft when completed to save stage outline.
7. Once the stage outline is saved you can begin adding lessons. Click the + Add Lesson link to open lesson outline. You can bow begin entering details for the following sections:
a. Lesson Times – Enter applicable times for estimation purposes only. These are displayed on the time allocation table to ensure FAR course requirements are met. Actual lesson times are recorded in user training record.
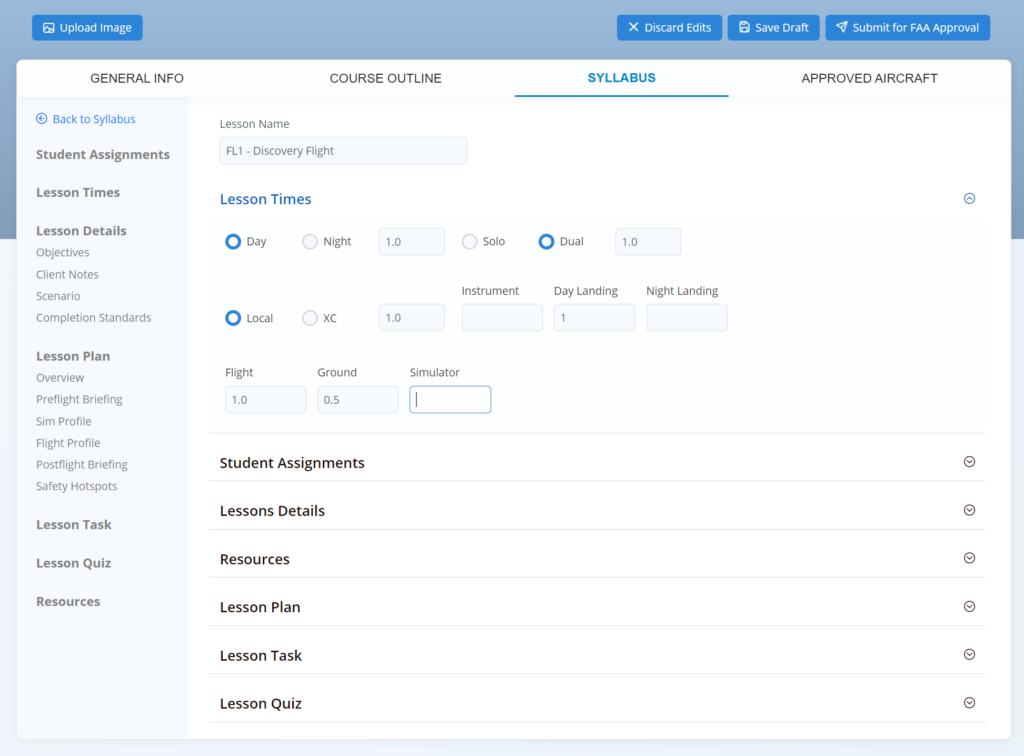
b. Study Assignments – If applicable, list tasks student is expected to completed in preparation for this lesson. This may include Things to Do or Things to Read.
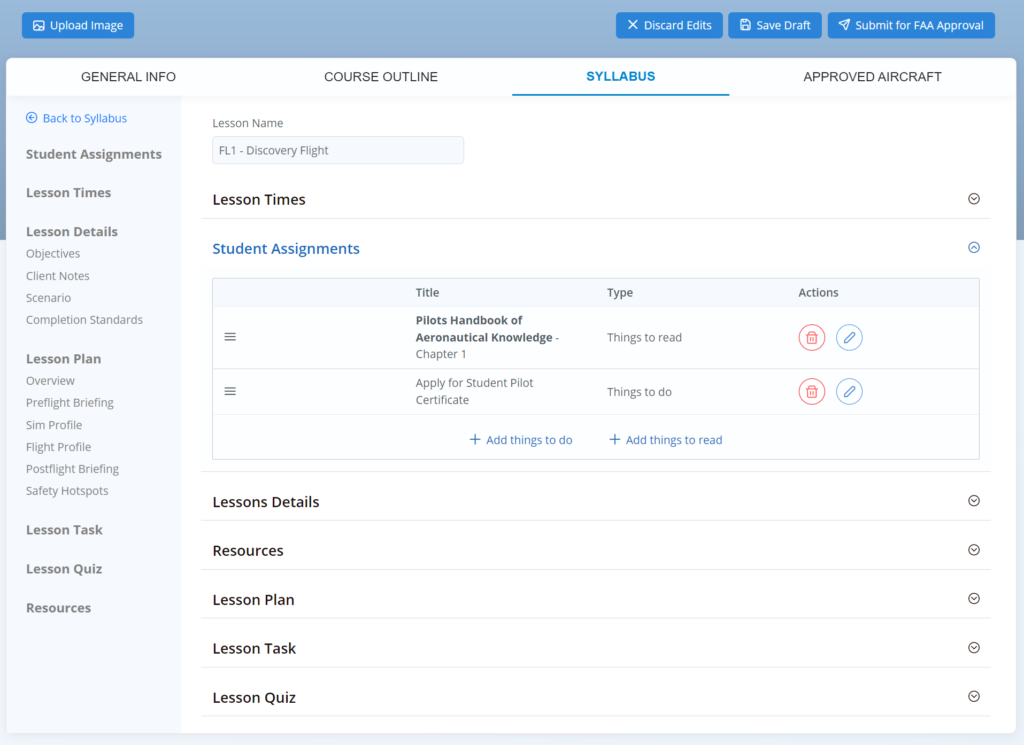
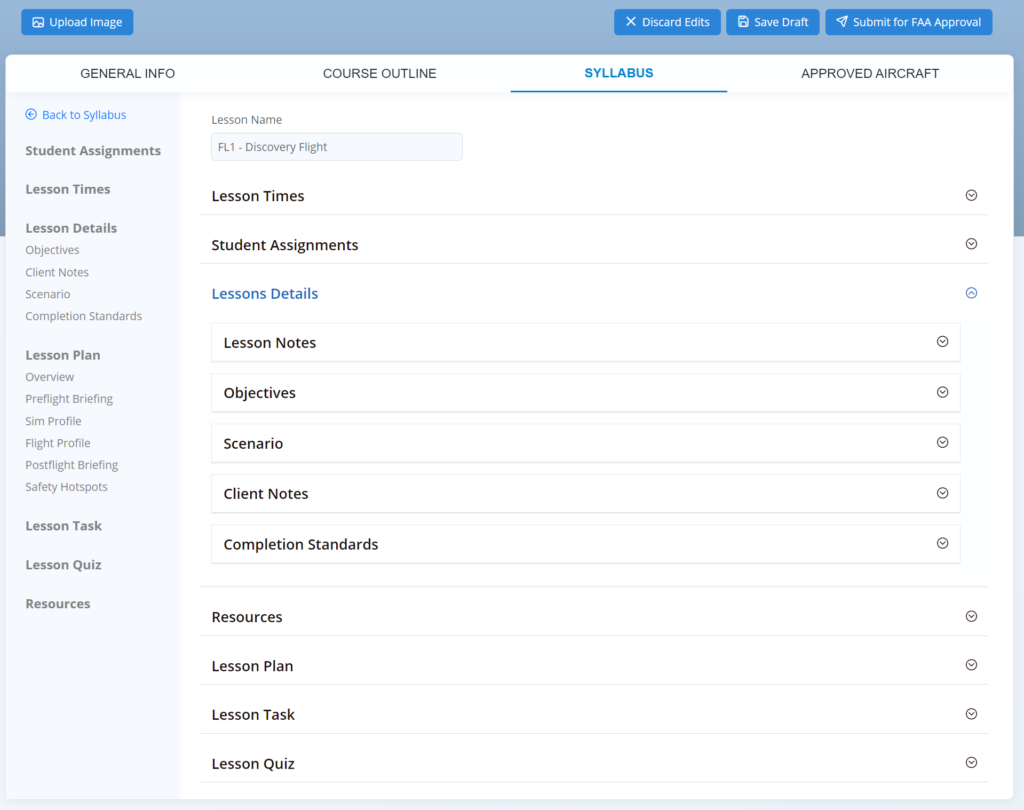
c. Lesson Details – This section includes items typically covered in traditional syllabus such as:
- Lesson Notes – Notes applicable to lesson. For example “Ensure 10 night takeoffs and landings are conducted prior to lesson completion to ensure course requirements are met.”
- Objectives – Lesson goals
- Scenario – Optional scenario, if using scenario-based training
- Client Notes – Comments in plain language to explain purpose of lesson so student can adequately prepare
- Completion Standards – Performance metrics for measuring objective are accomplished
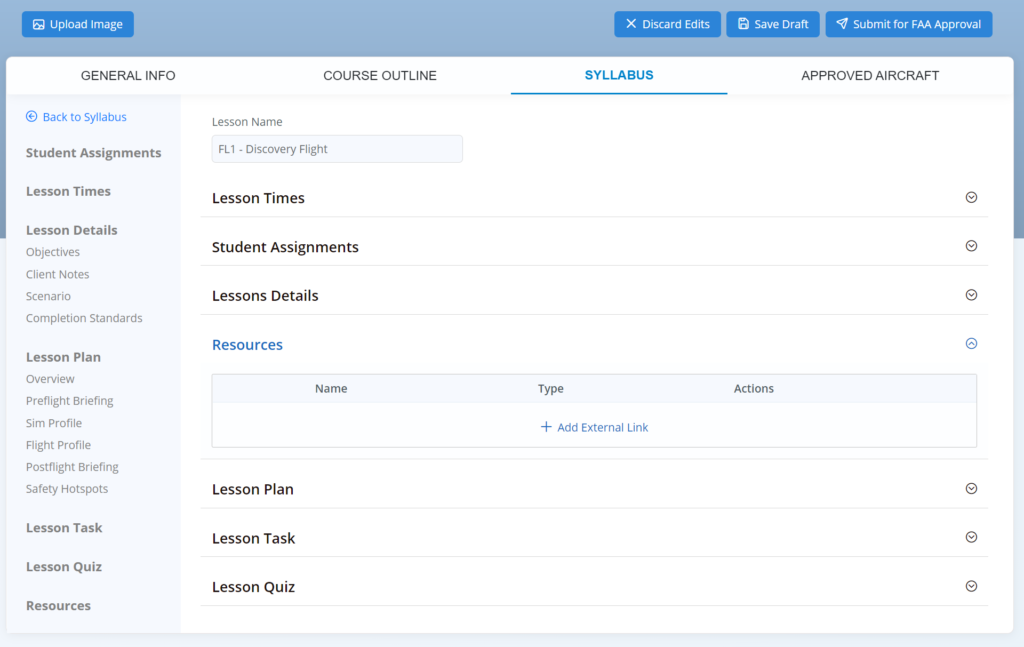
d. Resources – Add links to external resources such as videos or sites that supplement lesson objectives.
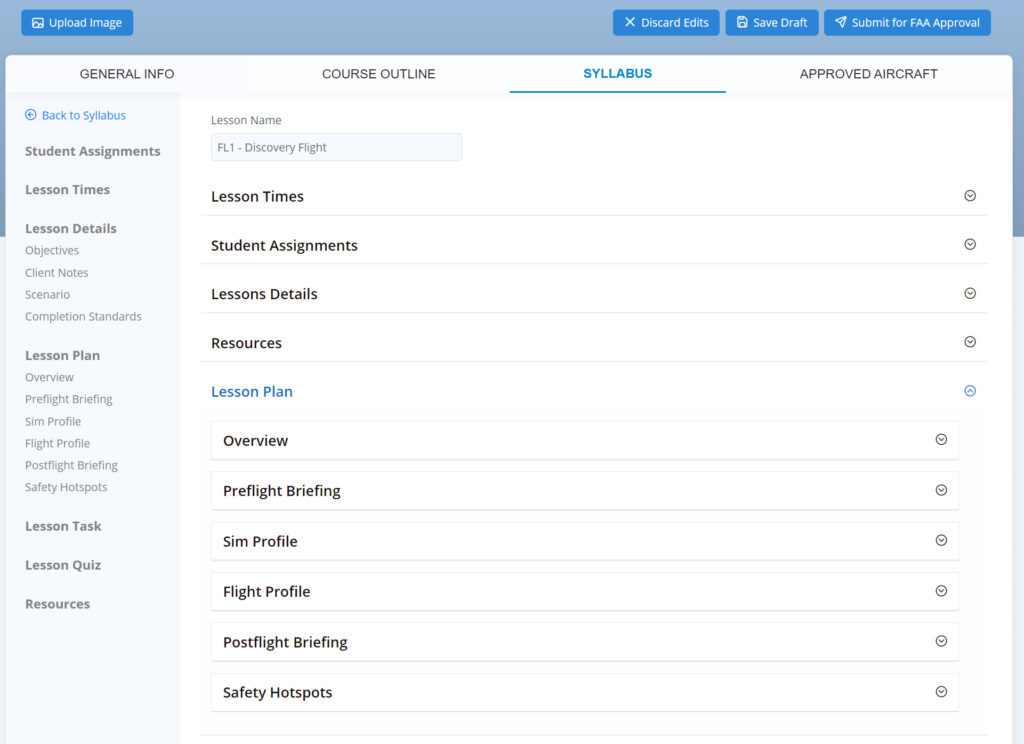
e. Lesson Plan – This section allows you to enter guidance on how the lesson is intended to be conducted. Though provided as a resource for instructors to ensure standardization, this section is visible to clients to ensure transparency. The lesson plan consists of:
- Overview – Describe the purpose of the lesson in plain language.
- Preflight Briefing – List content to be covered in briefing.
- Sim Profile – If applicable, list content to be accomplished in simulator including techniques, profiles, etc.
- Flight Profile – list content to be accomplished during flight including techniques, profiles, etc.
- Postflight Briefing – List content to be covered in lesson debrief.
- Safety Hotspots – List emphasis items to heighten awareness of risk areas.
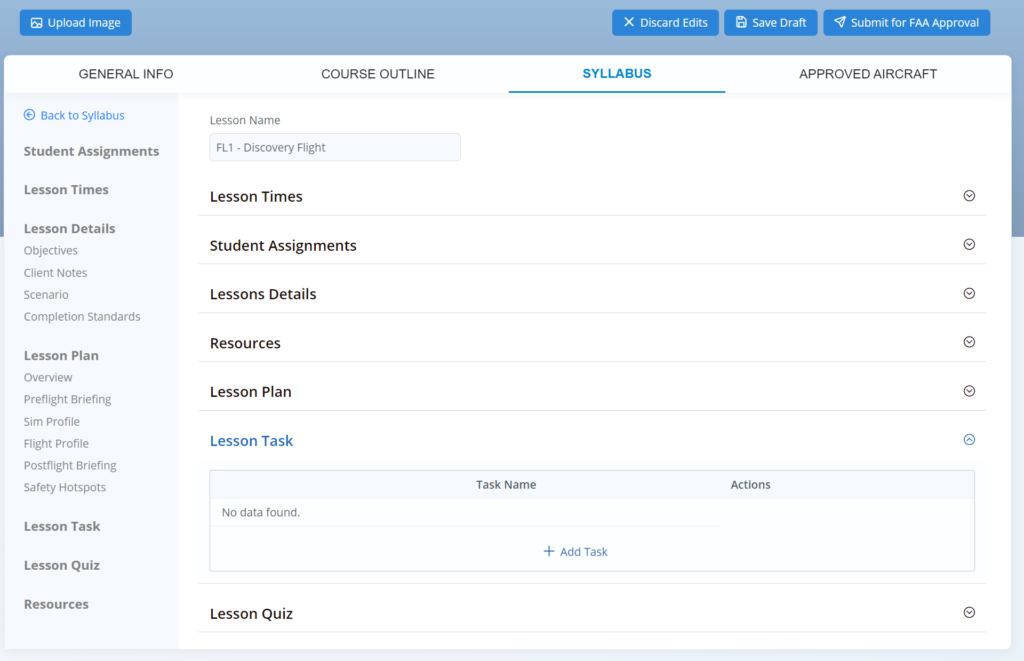
f. Lesson Tasks – Add lesson tasks to be graded using +Add Task link. All ACS tasks are provided for course type saved in General Info. You can also add custom tasks for grading purposes.
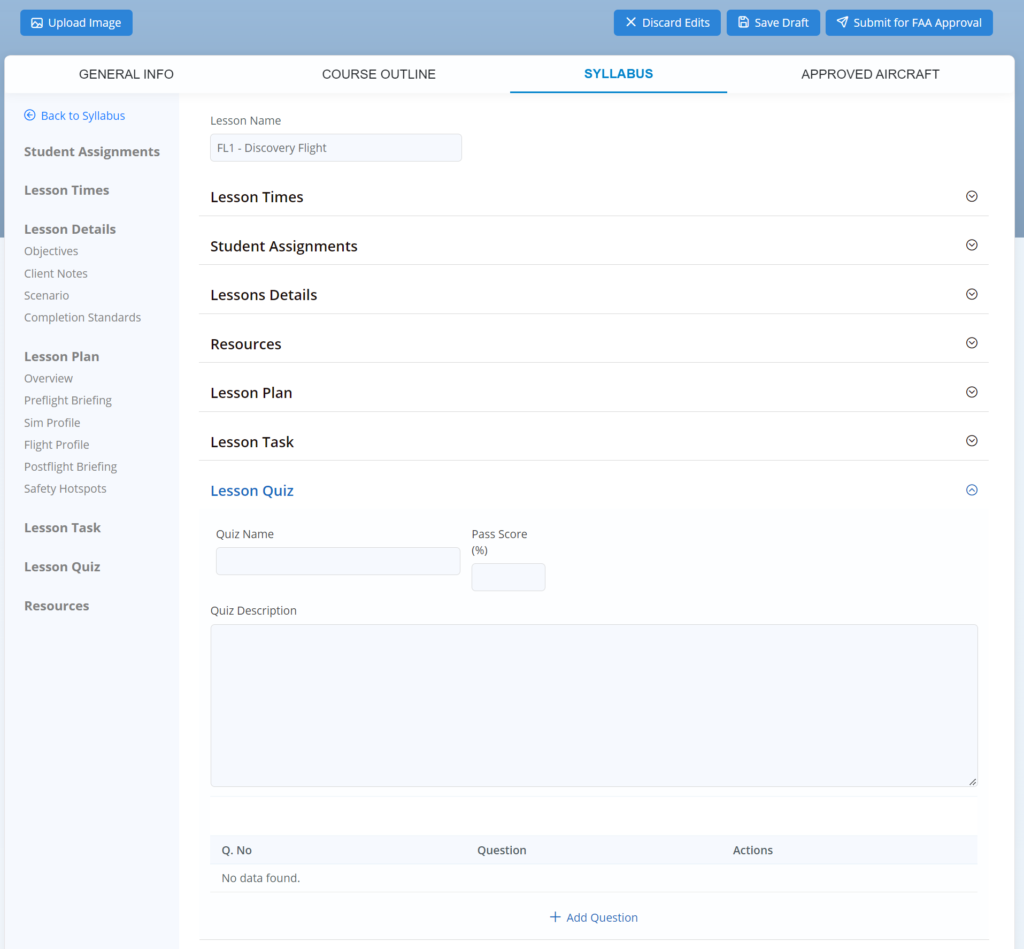
g. Lesson Quiz – If applicable, create a multiple-choice quiz for student to complete measuring knowledge areas appropriate to lesson content.
Click Save Draft button to save lesson details.
Click Approved Aircraft tab to select aircraft approved for course. If course is approved for both Part 61 and 141 enrollments, select aircraft applicable for each. When creating reservations, only those aircraft approved for course (and particular enrolled version) are selectable options.
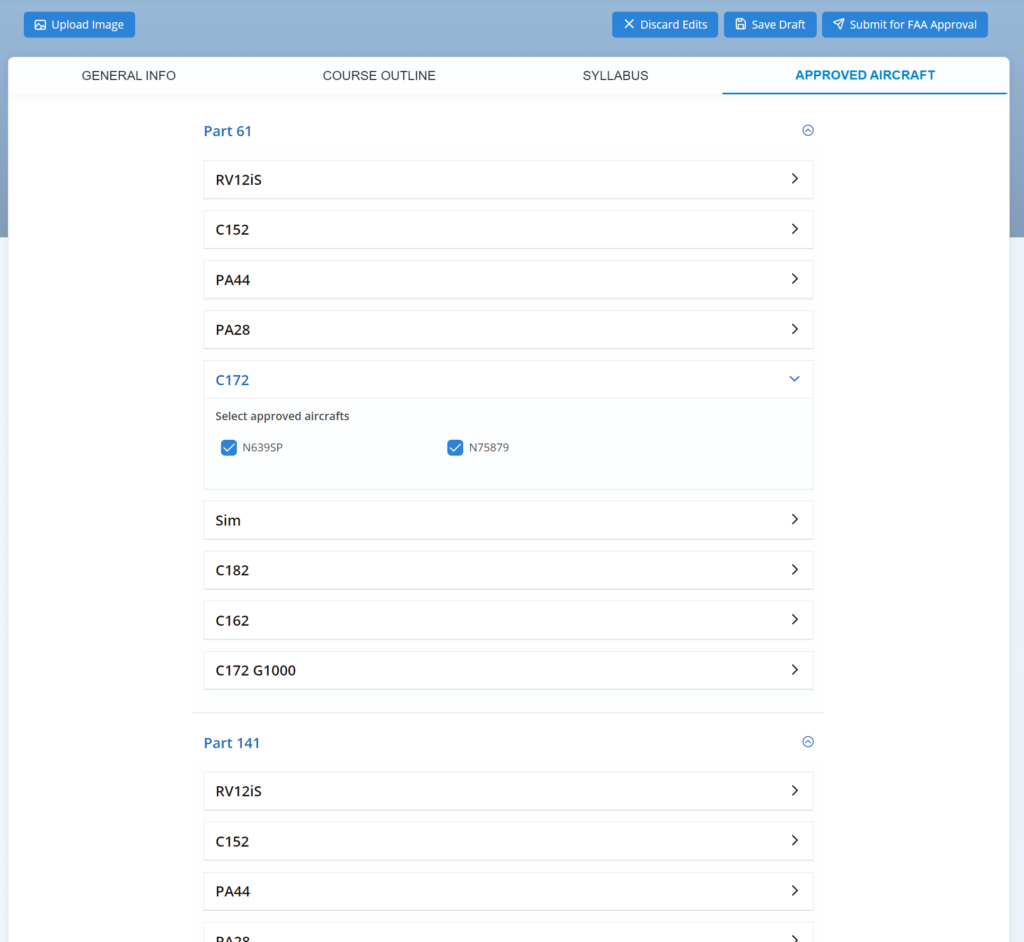
Click Save Draft to record changes.
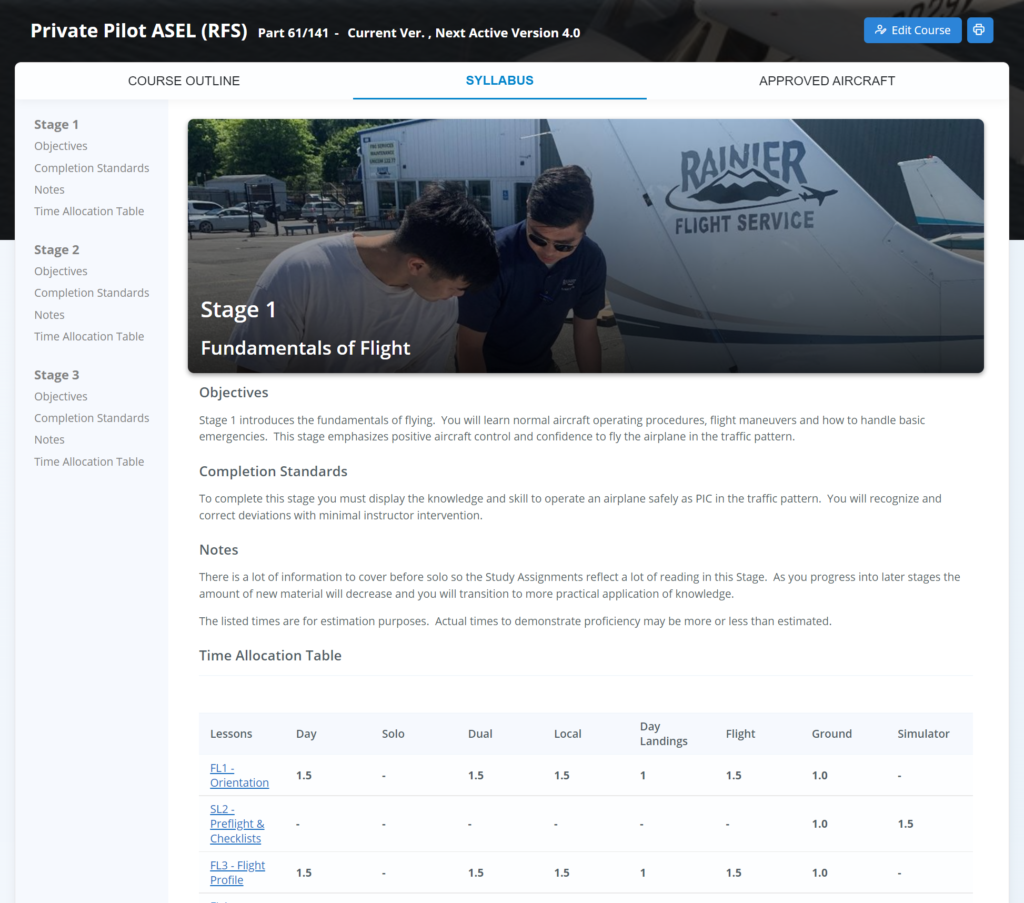
You can view draft course at any time by selecting course from catalog. Be sure to select appropriate Draft filter to view all available options.

Clicking the individual course tile will open course details for review.
See Publishing Course for steps on making course active for enrollments.